
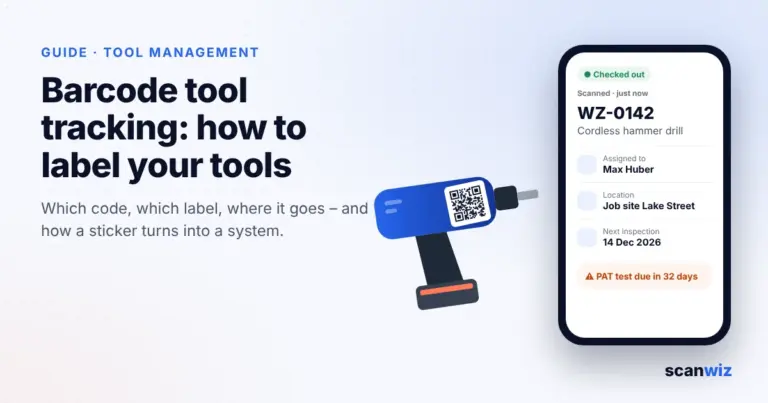
Barcode tool tracking sounds like a job for a rainy afternoon: print some labels, stick them on, done. In practice it rarely fails at the printer. It fails because the code on the cordless drill is unreadable after three weeks on site, because nobody knows what the number stands for, or because nobody ever scans again once the labels are on.
This guide shows you how to label tools so that it turns into working tool tracking: which code suits which tool, which label survives a job site, where it goes, and how to get from a box full of equipment to a system in seven steps. The label finder gives you a concrete recommendation for your tool in ten seconds.
Key takeaways
- Labelling tools means a unique number plus a scannable code, linked to a record. The sticker alone achieves nothing. Scanning at every check-out and return is what turns it into tool tracking.
- For most tools a QR code is the best choice: small, readable by any phone camera and robust thanks to error correction. Data Matrix suits very small surfaces, NFC works as an add-on.
- Job sites call for laminated polyester or vinyl labels, oil and heat for aluminium or engraving. Size: at least one tenth of the scanning distance.
- The asset number is always printed in plain text as well. Rating plates, warning labels and inspection tags are never covered.
Contents: Why label tools · Which code · Label finder · Label materials · Placement · 7 steps · Common mistakes · Checklist · With Scanwiz · FAQ
Why you should label your tools
A hammer drill easily costs several hundred euros, a rotating laser or measuring instrument considerably more. Yet in many businesses, valuable tools are managed by shouting across the yard, a spreadsheet or the stores manager’s memory. As soon as tools move between the stockroom, vans and job sites, that approach loses track. You know the results: searching every morning, duplicate purchases and equipment left behind on site. Our guide to preventing tool loss shows what that costs.
Proper labelling for barcode tool tracking solves four problems at once:
- Who has what? Every check-out is scanned, so each tool is assigned to a person, a van or a job site.
- No mix-ups: Five identical drills look the same but have different inspection dates and repair histories. The number tells them apart.
- Inspections under control: Power tools, ladders and lifting gear need regular inspections. A scan shows at once whether a tool is due. The UK HSE, for example, takes a risk-based approach to testing portable electrical equipment. More in our guide to equipment inspection intervals.
- Stocktakes in minutes: Instead of copying rating plates, you scan shelf by shelf and van by van.
Barcode, QR code, Data Matrix or NFC: which code suits tools?
Four types of marking are worth considering for tool tracking. The differences are less about price and more about how much space they need and how well they survive rough conditions:
| Linear barcode (1D) | QR code | Data Matrix | NFC tag | |
|---|---|---|---|---|
| Space needed | Wide and flat | Square, small | Very small | Coin-sized, can be embedded |
| Read with a phone | Yes, from the right direction | Yes, from any angle | Yes, from any angle | Yes, by tapping |
| Durability | A scratch across the bars can break it | Error correction up to about 30 percent | Built-in error correction | Unaffected by dirt, but not by metal without a special tag |
| Cost | A few cents | A few cents | A few cents | Much more than a label |
| Best for | Existing manufacturer barcodes | Almost any tool | Small tools and parts | Tools with heavy wear, as an add-on |
Our recommendation for barcode tool tracking in most businesses: QR codes as the standard, Data Matrix for very small surfaces and NFC as an add-on for tools where labels don’t last. RFID only pays off for tools in special cases, such as gates or automatic portal readers. You’ll find the full comparison in our guide RFID vs barcode vs QR code vs NFC.
What matters is not just the code, but what it contains. Store only the asset number or a short ID in the code, not long text. The shorter the content, the fewer modules the code has and the smaller you can print it. Everything else, from location to inspection history, lives in the software and can change without relabelling.
Label finder: which label suits your tool?
Barcode tool tracking starts with the right label. Choose what you want to label, where it is used and what the surface looks like. The finder recommends the code, label material, minimum size, error correction and the right position.
Your recommendation
–
- Code–
- Label–
- Minimum size–
- Error correction–
- Fixing–
- Position–
–
Guide values from practice and the QR standard ISO/IEC 18004 · Edge length at least one tenth of the scanning distance · Always test a label on one tool first
Label materials compared
The material decides whether your barcode tool tracking still works a year from now. Paper labels from the office printer are not an option for tools: they soften, smudge and tear.
| Material | Durability | Suitable for | Note |
|---|---|---|---|
| Polyester (PET) | Several years indoors | Workshop, stockroom, van, instruments | A matte finish reflects less when scanning |
| Laminated polyester | Resists abrasion, water and UV | Job sites, power and cordless tools | The print sits protected under the film |
| Vinyl | Flexible, weatherproof | Curved surfaces, ladders, cases | Conforms to curves |
| Anodised aluminium | Very long, even with oil and heat | Machines, lifting gear, workshops with chemicals | More expensive, fixed with rivets or adhesive |
| Laser engraving | Lasts the life of the tool | Metal tools, measuring tools | Needs a laser marker or a service provider |
| Cable flags, tags | Depends on material | Cables, hoses, slings, round parts | Fixed with cable ties instead of adhesive |
For the bonding surface: clean it with isopropyl alcohol, press the label down firmly and, if possible, don’t use the tool until the next day. Most pressure-sensitive adhesives don’t reach full strength immediately, but only after several hours.
Where the label goes on each tool
For reliable barcode tool tracking, the right spot is flat, easy to reach and touched as little as possible during work. Grips, batteries and contact surfaces are out, because labels peel off there first. Rating plates, warning labels and inspection tags are off-limits too, as this information must stay readable.
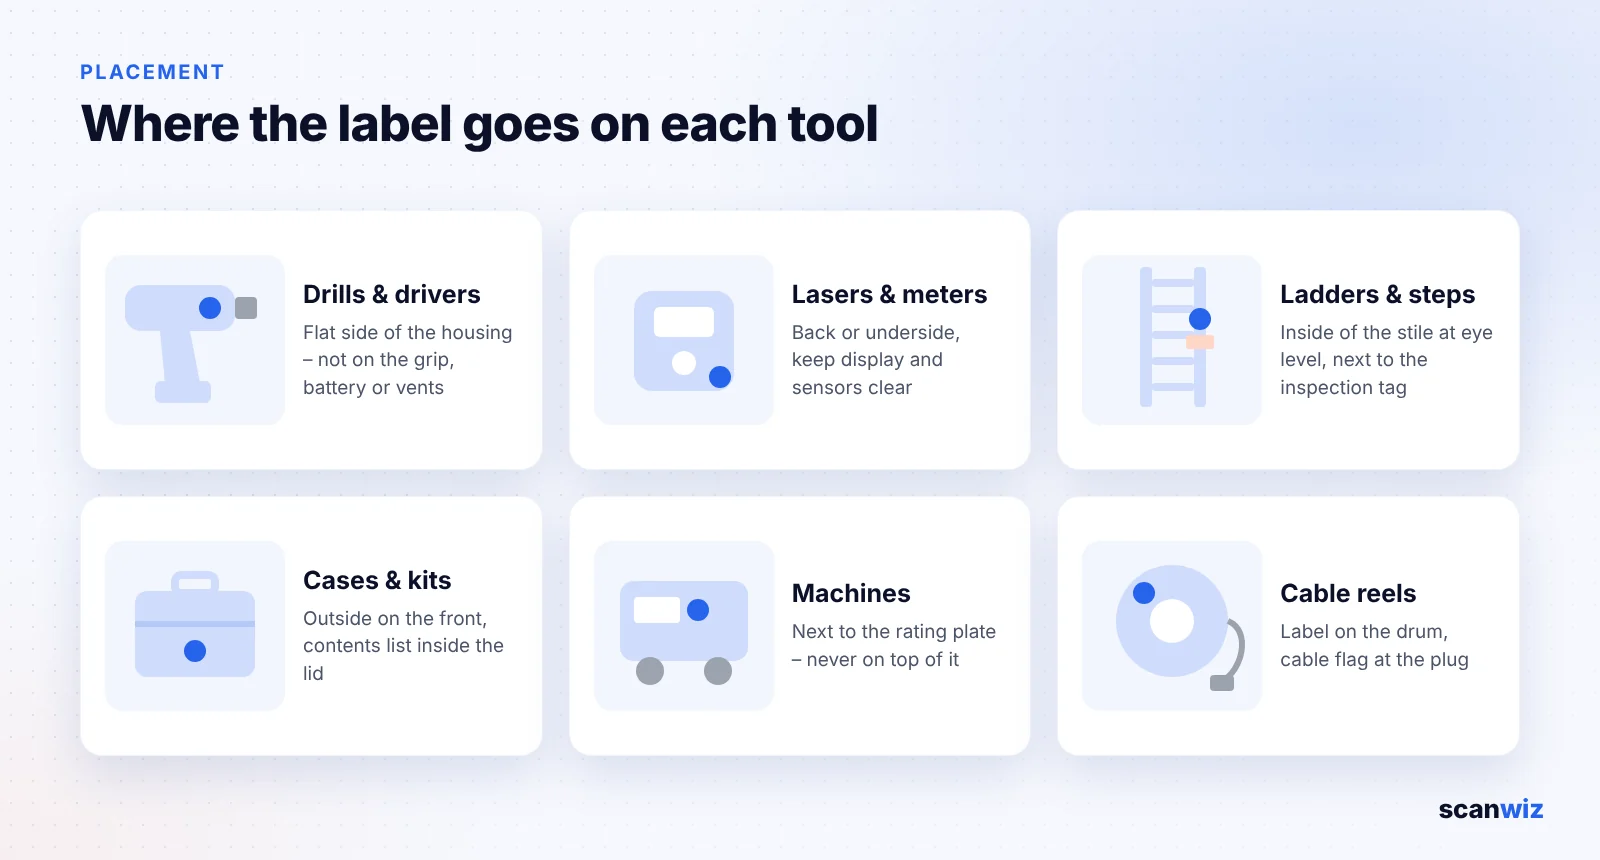
For kits such as bit boxes, socket sets or crimping tool cases, you usually label the case, not every single part. Put a contents list inside the lid so it is obvious on return if something is missing.
How to set up barcode tool tracking in 7 steps
- Take stock and define groups: List what you have and decide what is tracked individually and what is handled as a kit or consumable. A good threshold: anything that comes back and costs more than roughly 100 euros or needs inspections gets its own number.
- Set a numbering scheme: A short prefix plus a running number, for example WZ-0001 for tools, MG-0001 for meters, LE-0001 for ladders. Locations don’t belong in the number, because locations change.
- Create tool records: For each tool, record name, manufacturer, serial number, purchase date, value and a photo. Tools that need inspection get their interval and last inspection date straight away.
- Print and apply labels: Print the code and the plain-text number on the right material. The QR code label generator does this free in your browser. Work through one tool group at a time, not everything at once.
- Define check-out and return: Decide who issues tools, how they are returned and that every movement is scanned: to a person, into a van or onto a job site. For valuable tools, a handover with signature is worth it.
- Brief the team: Ten minutes is enough: how to scan, what happens with a broken tool, what to do if a label is missing. The most important rule is simple: no tool leaves the stockroom without a scan.
- Check and refine: Spot checks in vans, a short monthly check of expensive tools and a stocktake once a year. Replace unreadable labels as you go.
Common mistakes when labelling tools
- Paper labels or no laminate: On job sites they often last only a few weeks. Don’t save on material, relabelling costs more.
- Codes too small or without a clear margin: A QR code needs a margin of four modules all around, otherwise scans fail. Text or logos right next to the code get in the way.
- No plain-text number: If the code is damaged, the number must still be readable, including when reading it out over the phone.
- Covering mandatory markings: Rating plates, CE marking, warning labels and inspection tags stay clear.
- Labelling the battery instead of the tool: Batteries move between tools. The tool carries the number, expensive batteries may get their own.
- Labelling without a process: The most common mistake. If nobody scans at check-out and return, after three months you have nicely labelled tools and still no overview.
Checklist: labelling tools
- ☐ List of all tools, meters and ladders with value and inspection requirements
- ☐ Numbering scheme with prefixes defined
- ☐ Label material chosen to match location and surface
- ☐ Code with asset number in plain text, sized for the scanning distance
- ☐ Bonding surface cleaned, mandatory markings left clear
- ☐ Tools created in the software with photo, serial number and inspection interval
- ☐ Check-out and return rules written down and explained
- ☐ Date for the first spot check in the calendar
Label and track tools with Scanwiz
Scanwiz is inventory and tool management software for businesses that manage their own materials and tools. For labelling and tracking tools you get:
- QR labels straight from Scanwiz: Every tool gets its own code that you can print. Existing manufacturer barcodes such as EAN or Code 128 keep working.
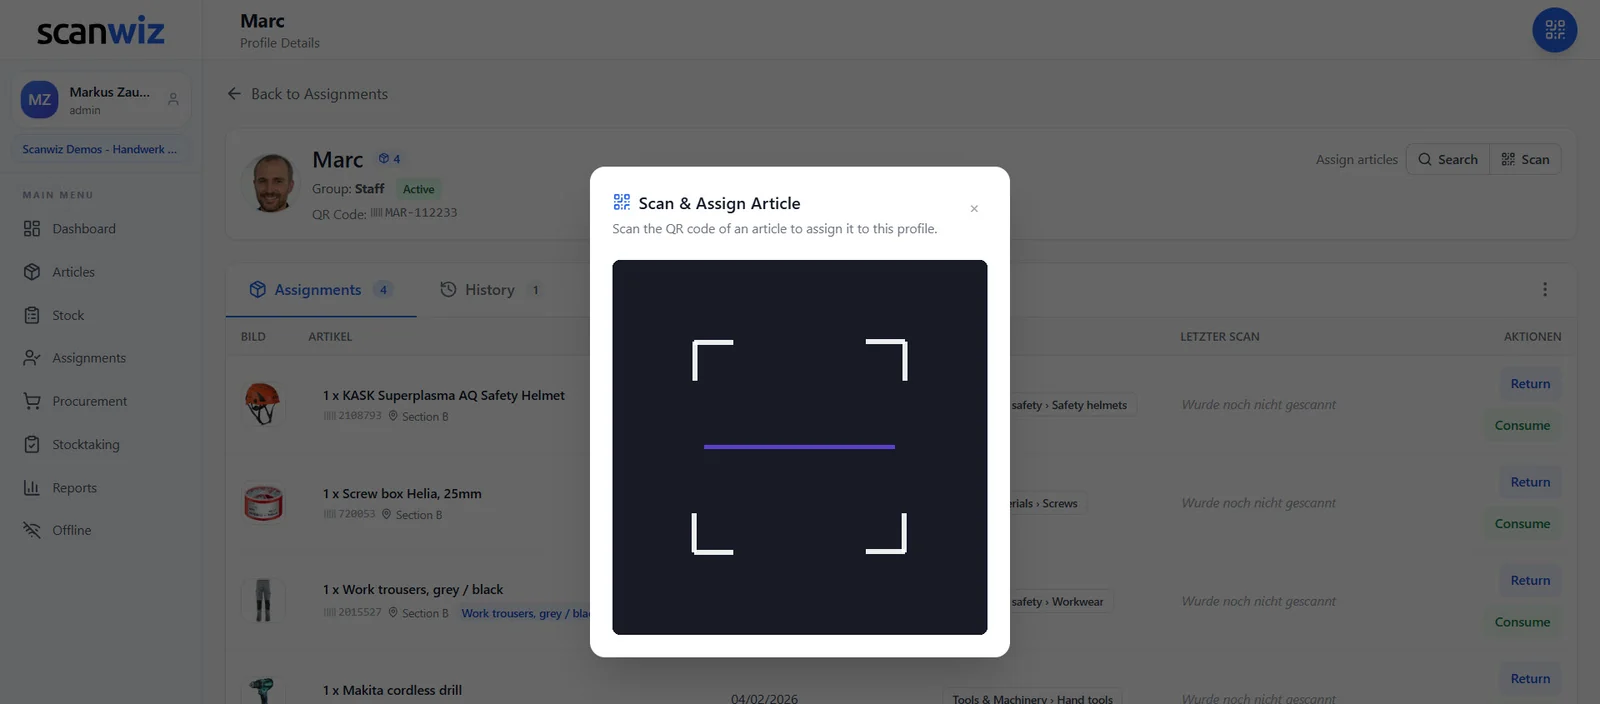
- Scanning with your phone: The app for iOS and Android reads QR codes and barcodes with the camera. Bluetooth and USB scanners and NFC tags work too, on iOS and Android alike. More on the barcode scanner page.
- Assignment by scan: Tools are assigned to people, vans or job sites. If you like, the employee signs the handover right on the phone. Our guide to construction inventory management shows how contractors organise this across sites, and electricians will find our electrical inventory list useful.
- Inspection dates with reminders: Electrical safety tests, ladder inspections or calibration are set up as intervals. Scanwiz reminds you in good time.
- Works without signal: In offline mode you keep scanning, even in basements or underground car parks. Data syncs as soon as you’re back online.
- Unlimited users: In every plan, all employees can scan without extra licences.
Frequently asked questions about barcode tool tracking
What is barcode tool tracking?
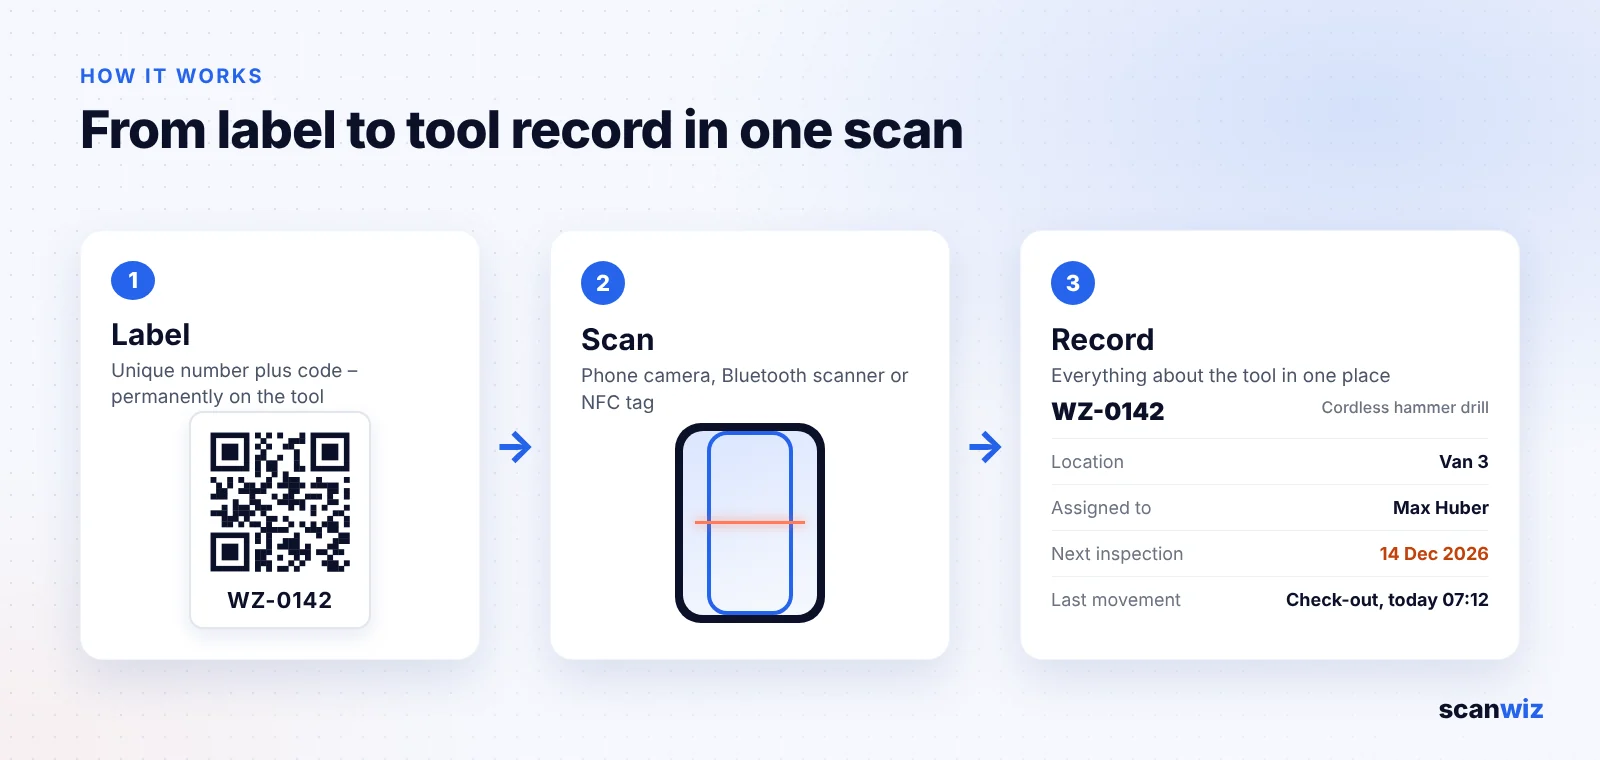
Barcode tool tracking means every tool carries a unique number and a scannable code, usually a QR code or barcode, linked to a record in software. Each time a tool is checked out, moved or returned, someone scans it, so you always know where it is, who has it and when it needs inspection.
Is a QR code or a barcode better for tools?
For most tools a QR code is the better choice. It needs less width, can be read by any phone camera from any angle and stays readable with scratches thanks to error correction. A classic linear barcode makes sense if tools already carry manufacturer barcodes or your handheld scanners only read 1D codes.
Which labels last on tools?
Polyester labels are fine in workshops and vans. On job sites, laminated polyester or vinyl labels with UV and water resistance last longer. Around oil, solvents or heat, anodised aluminium plates or laser engraving are the most durable. Paper labels are not suitable for tools.
How big should a QR code on a tool be?
As a rule of thumb, the edge length should be at least one tenth of the scanning distance. If the phone is held right next to the tool, about 15 mm is enough. For scanning from a shelf, around 40 mm makes sense, from one metre away about 10 cm. Leave a clear margin of four modules around the code.
Do I need a handheld scanner to track tools with barcodes?
No. Modern tool tracking software reads QR codes and barcodes with the phone camera. A Bluetooth scanner is worth it at a busy tool crib or during stocktakes, when many codes are scanned in quick succession.
Should I use NFC instead of QR codes on tools?
NFC is a good addition when codes suffer from dirt or wear, because the chip can sit under a protective layer. An NFC tag costs more than a label, needs a special on-metal tag on metal surfaces and is not visible at a glance. That is why many businesses combine QR codes and NFC.
What should a tool label show besides the code?
At least the asset number in plain text, so it can be read out without scanning. Your company name or logo is a useful addition so lost tools find their way back. Location, employee names or inspection dates belong in the software, not on the label, because they change.
Conclusion
Labelling tools is the easy part of barcode tool tracking if you choose code, material and position deliberately: a QR code with a plain-text number, a laminated label for job sites, a flat spot away from the grip and rating plate. The difference between labelled tools and real tool tracking comes afterwards, when every check-out and return is scanned. Start with your most expensive tools or those that need inspections, and you’ll quickly see how much searching disappears.
Updated November 2026. Size and error correction values for QR codes according to ISO/IEC 18004. The manufacturer’s instructions for your labels and tools take precedence.
More than 250 customers already rely on Scanwiz
Every tool in view with one scan.
Print labels, check out tools by phone and keep inspection dates in view automatically. Start for free or book a personal demo to see how it works in your business.


